Water You Really Drinking? GE’s New APF Technology

Post by Megan Stulberg (with help from Alexandra Courts and Aine Davis)

We love water! And we’re sure you do too, even if you don’t actively think about it. It keeps our skin clear, our digestive systems working and our bodies…well, alive. We rely heavily on water to make every Vegan Girlfriend recipe, whether it be cooking something on stovetop or rinsing out a blender. Personally, my favourite way to drink water is to chug an icy glass back after a long run.

A little birdie told us that according to an Associated Press survey, two in 10 Americans’ drinking water tested positive for pharmaceuticals including ibuprofen (Advil) and progesterone (found in birth control pills, WTF?). Yeah, no thanks. And then another little birdie told us that GE Appliances recently introduced Advanced Pharmaceutical Filtration Technology, which removes 15 different contaminants and 94-ish% of top 5 trace pharmaceuticals. To put it simply: GE Appliances figured out a way to make water cleaner and it’s worth the investment.

Slate Kitchen_Mabe_PFE24JMKES-2

IMG_6972

If you’re reading along like “I thought this was a recipe blog, why should I care about water?” then think about it like this. A runner wouldn’t be able to perform to the best of their ability in worn-down sneakers. We are nothing without our relevant resources.

Having a reliable fridge is so, so important as a food blogger. I was in university when we started Vegan Girlfriend and when you’re a full-time student with a part-time job in downtown Toronto…your kitchen is going to be pretty bleak. That being said, our fridge/water situation was a disaster! We were skeptical about apartment’s water quality in the first place, so we used a filtration pitcher but could barely even fill it up in our tiny sink properly. Now that I’m a fully-formed adult with my own place and choosing a fridge is even an option…I’m definitely scoping a new GE fridge out as my next big investment.

So how does it work? GE offers the Advanced Pharmaceutical Filtration Technology (let’s call it APF for short) across its new, accessibly priced refrigeration collection. The water filters on all APF fridges remove chlorine taste and odour, cysts, lead, asbestos and other contaminants — like those pesky pharmaceuticals we mentioned earlier. Good riddance.

Alex and Aine will be posting some more about GE’s fridge perks on our Instagram feed over the next few days. In the meantime, you can learn more about GE’s APF Technology on their website here.

What would you fill your new water-friendly fridge with? Tell us in the comment section below!

Processed with VSCO with f2 preset

R23280-2

*Disclaimer*: This is a sponsored post for GE Appliances, but all views are our own. For inquiries about sponsored posts, please email vegangirlfriend@gmail.com.

Vanilla Chia Pudding Parfaits (gf/v/raw)

Post by Megan Stulberg, Photos by Jenn McNaughton

These parfaits were perfect! I’m good friends with Jenn McNaughton, fashion blogger extraordinaire. Seriously though, check out her work at ethcsofstyl.com. Jenn recently interviewed me for the Ryersonian, and we discussed how the Human Rights Commission of Ontario has legally recognized veganism as an ideology with protection against discrimination. I headed over to Jenn’s apartment last Saturday, equipped with groceries and a hearty appetite, to whip up these treats for Jenn to photograph to accompany the article.

IMG_6190

IMG_6244

Ingredients…

  • 3 cups unsweetened almond milk
  • 1/2 cup fresh strawberries,chopped
  • 1/4 cup fresh whole blueberries
  • 1/4 cup 100% maple syrup
  • 9 tbsp (0.56 cups) white chia seeds
  • 2 tbsp pure vanilla extract
  • 2 tbsp unsweetened coconut flakesIMG_6221IMG_6232Directions…
    1. Whisk together almond milk, maple syrup and vanilla in large bowl or plastic storage container.
    2. Add chia seeds by the tbsp, stirring vigorously with spoon to prevent unwanted clumping.
    3. Cover bowl with cling wrap and leave in fridge overnight.
    4. Next morning, stir chia pudding then place back in fridge for 1-2 additional hours to help it further thicken.
    5. When ready to serve, scoop chia pudding into mason jars by the tbsp. Layer with fresh fruit and coconut flakes, or simply add after as toppings.

    Serve chilled. Makes 2 meal servings or 4 snack servings. Enjoy!

    IMG_6183

IMG_6173

Lentil “Meat”balls and Heavenly Homemade Tomato Sauce 

Post by Alexandra Courts 

There’s something special about fresh tomato sauce that doesn’t come out of a jar or a can. It’s aromatic, rich in flavour and incredibly versatile. This time around I’ve paired this homemade sauce with some nutrient-dense lentil “meat”balls. Whether it be served overtop a bed of pasta or sandwiched in bread, these two are a match made in heaven!

Keep reading to find out how you can recreate this lovely and comforting meal at home.


TOMATO SAUCE:

Ingredients…

  • 2 cans of diced tomatoes (14oz each)
  • 1 sweet onion (diced)
  • 4 cloves of garlic (minced)
  • 1/2 cup tomato paste
  • 1/4 cup soy sauce
  • 2 tbsp dried basil
  • 1 tbsp coconut sugar
  • 1 tbsp coconut oil
  • 1 tsp ground black pepper

Directions…

  1. Sauté the onion and garlic in coconut oil on medium heat in a saucepan until tender.
  2. Stir in the diced tomatoes, tomato paste, soy sauce, pepper, coconut sugar and basil.
  3. Simmer sauce on low heat slightly covered for about 20-25 minutes.
  4. Allow the sauce to sit while you prepare the lentil “meat”balls.

LENTIL “MEAT”BALLS:

Ingredients…

  • 2 cups chopped kale
  • 2 cups chopped mushrooms
  • 1 1/2 cups brown rice (cooked)
  • 1 1/2 cups lentils (cooked until very tender)
  • 1 cup rolled oats
  • 3/4 cup raw walnuts
  • 1/4 cup soy sauce
  • 1/4 cup tomato paste
  • 1/4 cup nutritional yeast
  • 1/4 cup coconut oil
  • 1 sweet onion (diced)
  • 5 cloves of garlic (minced)
  • 2 tbsp basil (fresh/dried)
  • 1 tsp ground black pepper

Directions…

  1. Preheat the oven to 350 degrees farenheit. Coat an aluminium foil-lined baking pan with coconut oil.
  2. Sautée the onion and garlic in coconut oil on medium heat in a deep skillet pan until tender.
  3. Pulse mushrooms and kale in a food processor/blender. Ensure that the pieces aren’t too fine.
  4. Add the kale and mushroom blend to the pan. Sautée the combination for a couple of minutes before adding the soy sauce, brown rice and lentils. Mix the combination together throughly and then add in the tomato paste, nutritional yeast, basil and pepper.
  5. Continue to cook the mixture on low-medium heat. Pulse the raw walnuts and rolled oats in a food processor/blender. Ensure that the pieces are only coarsely combined. Mix into the “meat”ball mix. Allow this to cool before rolling.
  6. Roll the “meat”balls in your hands so that they are about 1.5 inches in diameter. Place them onto baking sheet.
  7. Bake for about 25-30 minutes or until they are golden brown.
  8. Enjoy!

Makes 2 servings.

No-Bake Gingerbread Men Cookies

Post by Alexandra Courts 

The holidays are approaching, so we’ve come up with a recipe for a no-bake version of a very classic treat. Say hello to these cute and fiesty little gingerbread men… shaped like ninjas, because why not? All you’ll need to recreate this festive goodie is a handful of ingredients and a dehydrator. Keep on reading for the lowdown!


Tools…

Ingredients…

  • 1.5 cups dates (pitted and soaked overnight)
  • 1 cup raw almonds
  • 1 cup rolled oats (gluten-free if desired)
  • 0.5 cup ground flaxseed
  • 2 tbsp cinnamon
  • 1.5 tbsp nutmeg
  • 1 tbsp ginger

Directions…

  1. Blend dates until a paste-like texture is formed. Set aside in small bowl while you complete next step.
  2. Blend raw almonds, rolled oats , flax and spices until a fine, ground texture has been reached. Combine with dates by folding “dough” repeatedly with hands.
  3. Roll out the combined mixture with rolling pin between two pieces of parchment paper. Ensure that “dough”is at least of 1/2 inch thickness.
  4. Use cookie cutter to shape your cookies. Repeat the rolling process until all is used.
  5. Place the cookies in a dehydrator at 150 F for 2 hours.

Enjoy! Yields 10-12 cookies.

Roasted Brussels Sprouts with Garlic Tofu

Recipe by Megan Stulberg 

I found myself craving Brussel sprouts in the produce section of a grocery store a couple of weeks ago, despite never trying them before. I mentioned this to my mum a few hours later, and she reminded me that my grandfather had passed away that day exactly two years ago. Apparently they were his absolute favourite food, which I didn’t know about. I’m sure it was coincidence, but like…how eerie, right?

IMG_1939

Ingredients…

  • 2 cups Brussels sprouts, washed
  • 1 standard block extra firm tofu
  • 4 cloves garlic, finely diced
  • 1/4 cup gluten-free soy sauce
  • 1/4 cold-pressed EVOO
  • 1/4 cup vegan “butter” spread (I used Earth Balance)
  • 2 tbsp nutritional yeast
  • 2 tbsp dried thyme
  • 2 tbsp red chilli flakes
  • Sea salt and black pepper, to taste

Directions…

  1. Preheat oven to 400F.
  2. Chop stems off of Brussels sprouts and slice all widthwise.
  3. Toss Brussels sprouts in large bowl with vegan “butter”, sea salt and black pepper.
  4. Place on baking sheet covered with aluminium foil. Cook in centre oven rack and let roast for approximately 35 minutes. Flip every 5 minutes to prevent burning. Brussels sprouts will be light brown when done.
  5. While Brussels sprouts are cooking, press tofu block between pieces of paper towel with something heavy on top (book, cutting board, etc) until drained.
  6. Chop tofu into bite-sized chunks.
  7. Add EVOO to hot pan. Add tofu in a single layer and let cook until tofu begins to brown. Sprinkle soy sauce, garlic, nutritional yeast, thyme, chilli flakes, sea salt and black pepper on top. Flip tofu, and toss to coat with additional seasoning. Continue cooking until tofu is browned. Remove from heat and set aside.
  8.  Combine tofu and sprouts. Serve immediately.

Makes 2 servings.

IMG_1931 IMG_1928

Breakfast Hacks: Overnight Oats

Post by Aine Davis

Overnight oats are a healthy (and easy) way to enjoy breakfast on-the-go! Prepare the night before, and they’ll be ready in the morning. Just mix everything in a jar and leave in the fridge overnight.

PUMPKIN SPICE OATS: 

Top with toasted pecans and walnuts, if desired.

11820636_932016580193211_941620020_n

CHOCOLATE CHOCOLATE OATS: 

  • 1/2 cup almond milk
  • 1/2 cup coconut milk
  • 1/2 cup oats (same brand as above)
  • 3 tbsp raw cacao powder
  • 3 tbsp raw cacao nibs
  • 2 tbsp blue agave or maple syrup
  • 1 tsp pure vanilla extract

Chop up your favourite granola or snack bar to act as a topping!

11917788_1716233495271121_79345162_n

Peanut Butter and Banana

  • 1 cup almond milk
  • 1/2 cup oats
  • 1/2 cup natural peanut butter
  • 1/2 tsp vanilla extract
  • 1 whole banana

Serve with toasted pecans and your favourite jam!

Raw blueberry swirl cheesecake

Post by Megan Stulberg

Another (delicious) raw cheesecake recipe from Vegan Girlfriend? Shocker! If it ain’t broke, don’t fix it.

11426486_10155730278615133_1295006479_n

11650564_10155730276515133_130635652_n

Ingredients…

  • 1 lemon, juiced
  • 2 cups raw cashews, soaked overnight
  • 1 cup medjool dates, pitted and soaked 1 hour
  • 1 cup raw walnuts, soaked 1 hour
  • 1 cup frozen blueberries
  • 1/4 cup unsweetened shredded coconut
  • 1/4 cup organic coconut oil
  • 1/4 cup 100% maple syrup
  • Dash of almond milk, as desired
  • Water, as needed
  1. Make crust by using food processor to chop walnuts and dates until thoroughly combined.
  2. Press mixture evenly (and tightly packed) into deep cake pan lined with plastic wrap. Set aside in freezer.
  3. Combine cashews, lemon juice, coconut, oil, syrup and almond milk in food processor until creamy in consistency. Pour 3/4 of mixture on top of crust and leave 1/4 in food processor. Set pan back in freezer for 30 minutes.
  4. Add blueberries and water to food processor. Continue blending until a thick liquid is formed.
  5. Pour blueberry garnish directly onto cheesecake. Use chopstick or fork to shift mixture to create a swirl pattern.
  6. Leave in freezer overnight to set. Place in refrigerator at least 3 hours before serving to thaw.

Serve chilled. Makes 1 cheesecake (approximately 6-8 slices).

11657365_10155730278630133_55051593_n 11667167_10155730276420133_119011335_n

Raw Pasta Bolognese (with walnut meat, pine nut parmesan, basil pesto)

By Megan Stulberg

(Posted in advance on our Instagram here)

I grew up eating wheat pasta 2-3 nights each week, on average. My mum would regularly whip up spaghetti with ground beef, tomato sauce and mozzerella cheese…and a loaf of buttery garlic bread, of course. I haven’t had it in years but remember it vividly. When I think of comfort food, that is what instantly comes to mind.

Here’s a similar (but clean!) pasta alternative that’s cruelty-free to both animals and your stomach:

11292808_10155605673755133_1652158617_n

GROUND WALNUT “MEAT” WITH SAUCE:

Ingredients…

  • 1 cup raw sunflower seeds, shelled
  • 1/2 cup raw walnuts
  • 1/2 cup raw almonds
  • 1/2 cup fresh tomato, chopped
  • 1/2 cup sun-dried tomatoes, soaked overnight
  • 1/4 cup red bell pepper, finely chopped
  • 1/4 cup fresh parsley, finely chopped
  • 1 tbsp cold-pressed extra virgin olive oil
  • 1 tbsp garlic powder
  • 1 tbsp dried thyme
  • 1 tsp onion powder
  • 1 tsp pink crystal Himalayan salt
  • Dash of water, if needed

Directions…

  1. Combine walnuts, seeds, almonds, fresh tomato and sun-dried tomatoes in a food processor or high-speed blender until loosely incorporated.
  2. Add remaining ingredients and incorporate by hand. Be careful not to over-blend.

PINE NUT “PARMESAN”: 

Ingredients…

  • 2 cups pine nuts
  • 1/2 cup nutritional yeast
  • 2 tbsp pink crystal Himalayan salt

Directions…

  1. Pulse food processor to coarsely chop pine nuts. Transfer to large bowl.
  2. Add nutritional yeast and salt. Use fork to combine. Set aside.

BASIL PESTO: 

Ingredients…

  • 2 lemons, juiced
  • 2 cups fresh basil
  • 1 cup fresh spinach
  • 1/4 cup nutritional yeast
  • 1/4 cup raw sunflower seeds, shelled
  • 2 tbsp dried dill
  • 1 tbsp garlic powder
  • 1 tsp pink crystal Himalayan salt

Directions…

  1. Process all ingredients until smooth and creamy in consistency.

FINAL STEPS:

  1. Use a spiralizer (click here for a useful guide) to turn 4 medium zucchinis into a big bowl of zucchini noodles. If you don’t have access to a spiralizer, a similar effect can be reached by slowly slicing each zucchini lengthwise into VERY thin strips.
  2. In large bowl, toss zucchini noodles in with half the walnut meat and half the basil pesto. Note: there will be extra, so use sparingly and store unmixed leftovers in the fridge.
  3. Plate zucchini noodles. Top with pine nut parmesan and additional basil leaves for garnish.

Makes 4 entree-sized servings.

11292765_10155605673710133_1305640364_n

11311948_10155605673715133_1013986558_n

PROBAR Review

By contributor Alexandra Courts

Alright folks! We’re about to introduce you to one of the tastiest nutrition bars on the market, assuming you haven’t smartened up by trying them yet.

Facts: PROBAR is one of the leading providers of vegan, organic and non-GMO energy bars that are tasty, convenient, and healthy. They have a variety of products that range from energy chews to full meal-replacements. All vegan, most gluten-free. They have a wide variety of products to suit your individual preferences perfectly, and it’s easy to purchase them in local grocery stores or order online at www.theprobar.com.

PROBAR base bars have 20 grams of plant-based protein each (!!!) and come in a variety of delicious flavours: Cookie dough, brownie crisp, mint chocolate, peanut butter chocolate, and super greens. How good do those sound?! They’re disguised as desserts while actually being packed with healthy ingredients like flax seeds. These seemed to sit fairly heavily, so we’d definitely recommend having one after a workout.

PROBAR bite bars are a great on-the-go snack option that will give you the midday pick-me-up that your body is craving. Flavours include: Peanut butter crunch, chocolate cherry cashew, coconut almond, mixed berry, super fruit and greens, and peanut butter chocolate. Additionally, bite bars are soy-free.

IMG_7065 Processed with VSCOcam with f2 preset

We were so excited to give the PROBAR base and bite bars a try! In terms of texture: the bars were not at all dry, like some of the nutrition bars that are currently on the market. Each one left the tastebuds delighted, satisfied hunger cravings, and provided energy to the body that lasted throughout the day.

Special thanks to the kind people at PROBAR for sending these delicious treats our way to review.  

3 Day Cleanse with CEDAR JUICE: Review + Promo

Earlier this month Alex, Aine and myself participated in a 3 day juice cleanse. That’s right! No food, no coffee, nothing but juice. We chose Cedar Juice, a company making cold-pressed juice that is never pasteurized and uses only organic produce and superfoods. They ship across Canada and the juices will arrive at your doorstep 48 hours after placing your order, free of charge! 11004469_10155205299640316_1894869177_n 10927972_10155205299650316_121023331_n 
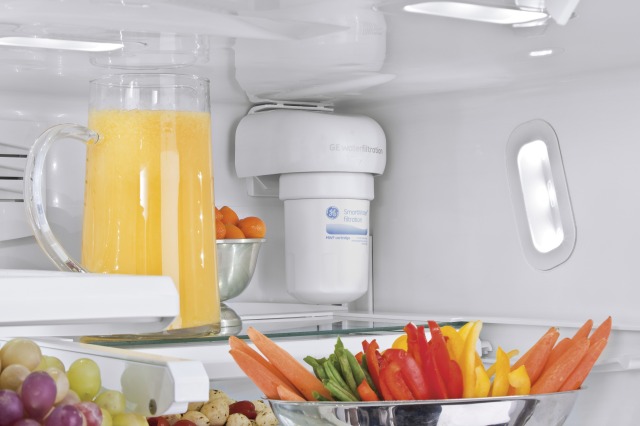
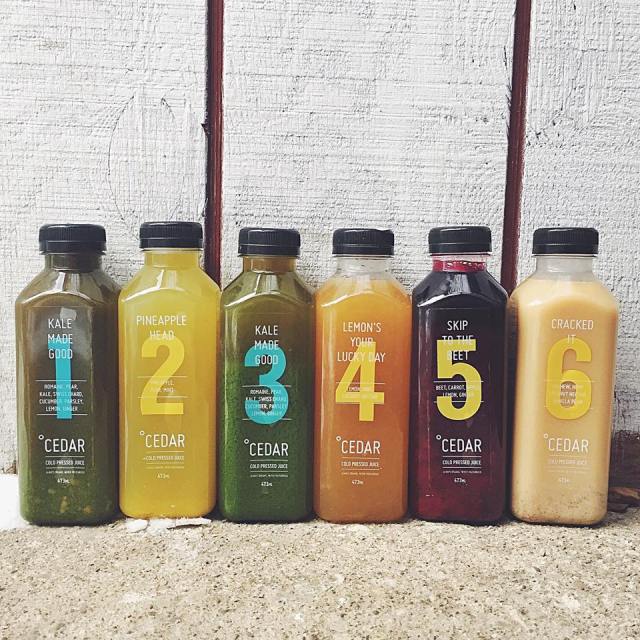
We’d all been mulling over the idea individually for a while but were a little nervous, so having each other for moral support definitely helped. To prepare the night beforehand we did a major fridge clean-out to prevent any temptation to cheat — but more importantly, to make room for 54 bottles of juice. Fifty four! Holy heck! That’s six bottles a day each for three days.

If you’d like to try a 3 or 5 day cleanse, use our promo-code “BG-vegangirlfriend” while ordering Cedar Juice online and receive 10% off! Offer is good until the end of February.  10356627_10155181921720133_424205602_n

MEG’S REVIEW: 

How I prepared for the cleanse: I’m a full-time university student so I went through my daytime planner and found a break between midterms where I’d be able to sleep properly and avoid overexerting myself.

Past cleanse experience: I’ve done week-long raw food cleanses every few months for the past two years to aid with digestion and generally look after my body. Because of this and my 100% gluten-free vegan diet, I likely experienced less severe detox symptoms than most would.

Day One Summary: I had been out drinking the night before, which was an awful idea because it resulted in detox symptoms hitting me very quickly. I felt light-headed and the extreme cold weather just made that worse. I spent most of the morning worrying that I made a huge mistake spending money on a cleanse that I wouldn’t be able to stick to. As I pushed through juice after juice throughout the day, my body adjusted and I felt a lot better. I was surprised by how good the juices actually tasted. I immediately appreciate how Cedar Juice set up the drinks to be consumed in a specific order so that a sweet taste followed a vegetable-based one. 

Day Two Summary: No more detox symptoms! I felt a bit nauseous first thing in the morning, but I’m assuming that was from hunger as it stopped immediately after my first juice. I had made sure to sleep a lot the night before, which helped with my caffeine withdrawal the following morning. My stomach stopped growling by midday and I started thinking about food less. I was sitting on the train that evening and a small child gasped and pointed at my bottle of beet juice. He turned to his mother and said, “I didn’t know vampires drank blood with straws!”. I looked pretty tired and my teeth were stained red, so I’m sure I gave that kid quite a scare. 

Day Three Summary: By the third day I felt very confident that I wasn’t going to give into any cravings. I had fallen into the routine of a liquid diet very quickly to the point where I felt comfortable with it. I switched up the suggested order a bit to avoid drinking beet juice in public like I had the previous day. Additionally, I made plans to go for brunch the following day with a friend to have something to look forward to. 

Main Symptoms: Bloating, headaches, cravings.

Best part: My head felt SO clear by the second day, and has ever since! I have a history with anxiety and related mental health issues, so I was pleasantly surprised that this helped my mindset. 

Worst part: I experienced beeturia (an actual thing!) which is when beetroot passes through your system and alters the colour of your urine. It looked like I dumped the entire bottle of beet juice directly into the toilet, which is probably what most teenage boys think an ordinary period looks like. It didn’t cause any physical pain, but definitely caught me off guard. 

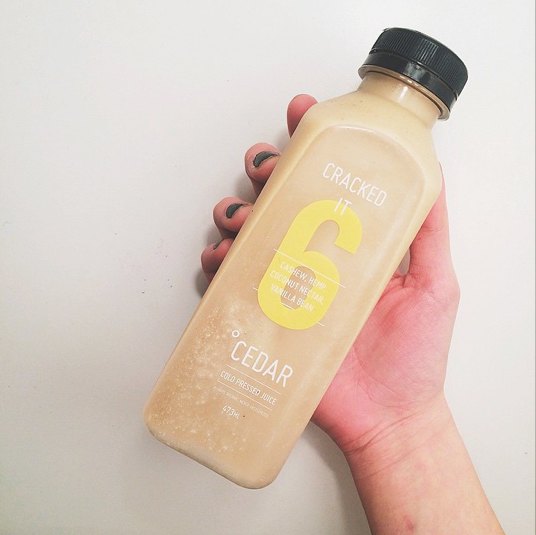
Favourite flavour: #6 “Cracked it” by far was my favourite! It felt like I was rewarding myself with dessert after a hard day’s work (of not eating) and I’m a sucker for vanilla bean. 

Did I cheat? Nope! Not even a little.

Again? I would definitely do this cleanse again! I found myself wishing I was still on the cleanse a few days later, after something I ate had given me a stomachache.

Additional notes: It’s hard balancing school and work, but I wish I’d done this cleanse when I could have been on a break from both! I have a labour-intensive job and worked all three days. It was tough, but manageable. If you have a busy schedule like I do, carry your juices in a backpack and keep them refrigerated throughout the day if possible.

10994738_334455653418878_1798949116_n

AINE’S REVIEW: 

How I prepared for the cleanse: Three days before the cleanse began, I consumed mostly raw food. I took hot baths to aid in relaxing my body as much as possible. I ate an entire bag of tortilla chips the night before to prevent myself from giving in and eating them during the cleanse.

Past cleanse experience: None! I tried to do a week long raw cleanse while Meg was doing one last year, but at the time I was having issues with blood sugar so I only lasted a day.

Day One Summary: Oh boy. It was rough. I couldn’t sleep well the night before and had a 10 hour school day ahead of me. I go to school for comedy performance, so my days are physically exhausting with rehearsals. I could barely think straight during a midday meeting with a professor! By the time I got home, I was feeling pretty light headed so I went to bed as soon as I could. 

Day Two Summary: I started the second day fighting awful cravings to stress eat, but I knew that I would feel less stressed after eliminating toxins from my body. Although I was a bit sluggish physically, I was extremely mentally alert. I did a 6 hour rehearsal and focused the entire time. It felt great! That night I was so tuckered out from all the hard work I went to bed as soon as I got home.

Day Three Summary: The final day was a breeze. I worked a 9 hour shift and was initially worried that being surrounded by food all day I’d go crazy, but I didn’t find myself craving anything but the juice, which I sipped happily throughout the day. The day went by quickly and I felt fine. I actually bought a few bottles of Cedar juice from Bolt Fresh Bar on my way home!

Symptoms: Upset stomach and a bit of dizziness, but nothing horrible. 

Best part: Catching up on my sleep was wonderful! My dreams were insanely vivid and fun, and I woke up both mornings with ideas for new sketches. 

Worst part: Being busy!

Favourite flavour: My favourite juice was #4: Lemon’s Your Lucky Day. It tasted great and provided the perfect midday energy boost.

Did I cheat? I ate an avocado on the second day before bed, and washed it down with some organic lemon juice. I also ate some plain quinoa on the final night. I was overworked and scared I was going to faint.

Again? I’d do it right now if I could.

Additional notes: Stay hydrated! Anytime I felt hungry and it wasn’t time for another juice, all I had to do was drink water and I would feel fine. Plan ahead! Learn from my mistake! I would have enjoyed the cleanse more than I did if I wasn’t so busy. Ease out! The first day off the cleanse I ate nothing but raw foods and juices. Even two weeks later, I still find myself choosing smoothies over solid foods.

Screen Shot 2015-02-21 at 12.59.09 AM

ALEX’S REVIEW: 

How I prepared for the cleanse: The day before the juice cleanse I wanted to help my body deal with the transition from solid food to juices, so I made sure to drink plenty of nutrient-rich smoothies. I knew that the first day of the juice cleanse would be slightly exhausting with work/school, so I made sure to get enough sleep so that I was fully rested.

Past cleanse experience: None! As a gluten-free vegan I already have a daily clean/wholesome diet that incorporates whole foods regularly.

Day One Summary: I started the cleanse with a positive mindset. By midday I was feeling a little tired and hungry, but then I remembered how important it is to keep hydrated between juices. After drinking some water I started to regain my energy and the hunger subsided until it was time for my next juice. It wasn’t until about 8pm where I felt like I was starting to experience detox symptoms such as nausea and weakness. I started to miss the motions of eating. I wanted so desperately to crunch down on some almonds. After finishing all the juice, I drank some water and went to sleep early. 

Day Two Summary: After my first juice of the day, my body felt a little stronger and I had enough energy to get me through the day. I studied in a coffee shop for a while and was seriously distracted by everyone around me sipping on lattes and munching cookies. At this point I knew I was so close to finishing the cleanse and was so happy and motivated to keep strong until the end, but I was longing for a big bowl of hot hot soup.

Day Three Summary: On the third day I was looking forward to each one of my juices. They kept me satiated and energized as I went through my busy day and I successfully avoided taste-testing the vegan cheesecake I made for Valentine’s Day. I was feeling more and more full with each juice consumed. At midnight I broke the fast and treated myself to a vegan/gluten-free treat from Bunner’s Bake Shop.

Symptoms: Nausea, weakness, dizziness.

Best part: My body felt refreshed and energized!

Worst part: The initial feeling of nausea on the first day of the cleanse. I thought I would feel sick throughout the entire thing, but it subsided by the next day.

Favourite flavour: “Pineapple Head”. It tasted like a piña colada!

Did I cheat? Nope!

Again? Absolutely! I feel like maybe next time I’d like to push myself and try the 5 or 7 day cleanse instead.

Additional notes: I would like to possibly eat raw the day after the juice cleanse finishes to help my body have an easier transition into solid foods again. I jumped straight into food post-cleanse and am curious as to how my body would benefit from going with this approach. Next time around for sure!

Screen Shot 2015-02-21 at 1.02.10 AM